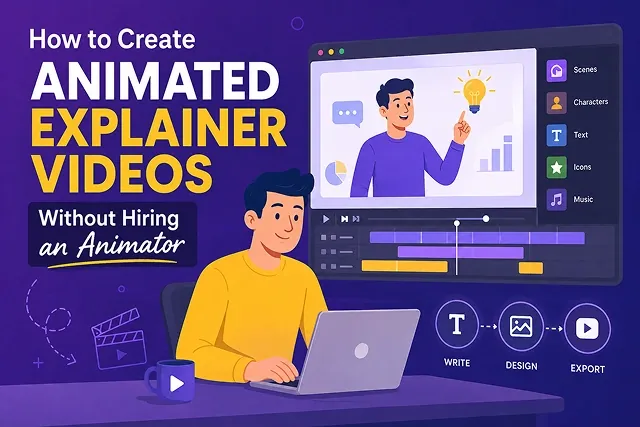
Making an animated explainer video up until now meant having to hire a motion graphics company, spending tons of money, and waiting for weeks to see the changes done to the final cut. With the implementation of modern AI video engines, drag-and-drop platfoms in the cloud, and text-to-speech programs it became possible for one creator or marketer to produce a ready explainer video in a single afternoon.
The whole process requires a simple, totally straightforward plan which can help to turn an idea into a ready video.
Above-the-Fold Feature Matrix: Agency vs. DIY AI Animation
Animation Production Matrix · Agency Services vs. DIY AI Pipelines
| Production Dimension | Traditional Motion Graphics Agency | Modern AI DIY Animation Stack |
|---|---|---|
| Average Turnaround Time | 3 to 6 Weeks (Scripting, storyboarding, rendering) | 15 to 45 Minutes (End-to-end production) |
| Cost Per Finished Video | $2,000 – $10,000+ per video minute | $0.00 – $30.00/mo (Platform subscription) |
| Voiceover & Audio | Requires hiring regional voice talent | Instant AI neural voiceovers in 50+ languages |
| Revisions & Iteration | High fees and days of wait time per scene change | Instant text-prompt editing and scene swaps |
| Technical Skill Floor | Adobe After Effects, Illustrator, Cinema 4D | Zero design or coding experience required |
1. The Five Stages of Video Creation
The following steps should be adhered to while making your animated video explanation:
1. Write the script of the problem and solution
Script length limit -03 Keep your script between 120 and 180 words (60 to 90 seconds total): Structure your script according to this high-converti…
- Hook (from 0 to 10 seconds): state the main problem your audience has.
- Problem (from 10 to 25 seconds): describe the reason for the failure of alternative solutions.
- The Solution (from 25 to 50 seconds): present the product or concept, and list two to three key benefits.
- Hook (from 50 to 60 seconds): present just one, actionable next step (e. G. “Go to our site and register for a free trial”).
2. Synthesize Voiceover Audio
- Use the AI voice generator to produce your finalized script. There are many voice generators on the market nowadays – you can try ElevenLabs or Descript, or any you like to use. Choose the warm and friendly voice tone.
3. Assemble Scenes & Character Actions
Import your voiceover track into your chosen animation studio (e.g., Vyond or Animaker). Match visual scenes to the spoken audio:
- Write actions that correspond to character dialogues (e. G., a character frowning at the "problem," then smiling at a dashboard in the "solution.").
- Keep background elements sterile, so attention focus on the main narrative.
4. Add Motion Graphics, Kinetic Text & SFX
- Add overlay kinetic typography with text positioned in the center of the screen to highlight critical messages, as well as small UI pops and soft page-flip or whoosh sound effects on the scene transitions and background music at -18dB.
5. Review & Export Master File
- Before exporting be sure to preview in the timeline to make sure the scenes match up with the video beat. Export this as either 1080p Full HD (1080p HD, 1920 x 1080) for YouTube and the internet or 1080x1920 (9:16) for a mobile feed.
1. Top No-Code Animation & AI Video Platforms
No-Code Animation Comparison · Animation Styles, Core Strengths & Best Use Cases
| Platform | Animation Style | Core Strength | Best For |
|---|---|---|---|
| Vyond (Vyond Go) | 2D Vector & Whiteboard | Large character builder library and script-to-video AI generation. | B2B SaaS, corporate training, and educational explainers. |
| InVideo AI | Dynamic Stock & Motion | Generates a complete storyboard, script, and video draft from a single prompt. | Social media explainers, marketing ads, and quick concepts. |
| Animaker | 2D Cartoon & Character | Drag-and-drop character posing with extensive action presets. | Fun brand explainers, educational content, and Shorts. |
| Synthesia / HeyGen | AI Presenter Avatar | Realistic AI avatars that read scripts with active lip-syncing in 175+ languages. | Product walkthroughs, SaaS onboarding, & help docs. |
Request A Custom AI Video
Tell us what you're trying to create and we'll point you to the right tool — or help you set it up.
2. How Modern Tools Use No-Code Animation and AI Avatars
Recent technologies are getting rid of the age-old method of producing animation through the use of software that incorporates frame by frame animation by using two systems in place of it. This technology includes Inverse Kinematics Asset Engines along with Neural Diffusion and NeRF Avatar Systems.
[Script & Audio Input] ➔ [Neural Text-to-Speech Parser] ➔ [Phoneme-to-Viseme Mapping]
                                                    │
                            ┌───────────────────────┴───────────────────────┐
                            ▼                                               ▼
[2D Inverse Kinematics (IK) Engines]         [Neural Diffusion / Avatar NeRFs]
(Calculates vector bone angles              (Synthesizes mesh movement
    & joint movement)                           & facial textures)
                            │                                               │
                            └───────────────────────┬───────────────────────┘
                                                    ▼
                                    [Composite 4K Master Video]
1. Vector Inverse Kinematics (IK) Engines (Vyond and Animaker will come in handy here)
- Mechanism: The explanation of the function is as follows: A character is represented as a vector skeleton and given a system of bone hierarchy. Every time you enter a particular action like "walk" or "point," the system will automatically calculate the angles of every joint in every frame.
- Why It Matters: Massively reduces hand-animating every frame. Simply slide the weight of the emotion and the engine recomputes the vectors at the character's face.
2. Neural Viseme & NeRF Avatar System (e.g., Synthesia, HeyGen)
- Mechanism: Instead of creating a flat cartoon, these systems process the neural audio signals into visemes, which refer to the mouth movements of the speaker.
- Why It Matters: This allows AI avatars to deliver the same script in over 175 languages with proper lip synchronization, small facial movements and eye engagement, without requiring any physical recording or animated production.
3. Production Workflow Pipeline
To ensure your self-made animated video looks professional, execute this systematic assembly sequence:
1. Script Drafting & Problem-Solution Structuring
- Create a natural 60-90 second video script (140–160 WPM) with a clear logical structure: Hook (0-10 seconds), Problem (10-25 seconds), Solution + Demo (25-50 seconds), and CTA (50-60 seconds).
2. Synthesize Master Audio Stem
- Paste your script into an AI voice synthesizer tool like Vyond’s on-screen text-to-speech engine orElevenLabs. Leave the voice stability to around 45% to capture nuances in cadence, then Download as a clean, 24-bit WAV file.
3. Automated Scene Generation & Asset Placement
- Upload your audio stem into your animation studio. Let the platform's AI draft the initial scene layouts. Fine-tune character positions, applying Inverse Kinematics (IK) actions to align physical gestures with key voiceover beats.
4. Kinetic Captions & Sound Design Pass
- Center animated kinetic auto-captions on screen for mobile audience. Play modest transition sound effects (whooshes, UI clicks) on scene transitions, have background music duck by -18dB behind theVO track.
5. Quality & Master Export
- Check the visuals on desktop and mobile devices. Export the final render in Full HD (1920 x 1080) at 30 FPS.
AI Animation Guide
Build high-converting 2D and 3D animated explainer videos using automated generative workflows.
Non-animators can replace manual keyframing with Automated Generative Animation Workflows. AI tools interpret written text scripts to draft scene layouts, synthesize voiceover tracks, select pre-rigged 2D/3D assets or generate custom character motion paths, and handle lip-sync alignment automatically. This shifts your primary role from manual animator to creative prompt director.
The top specialized tools include: Kling AI & Vidu AI (exceptional for 2D anime and custom stylized cartoon motion paths), Vyond & Renderforest (ideal for structured corporate 2D/3D whiteboard and vector business animations), and InVideo AI & CapCut Desktop (the fastest options for automated script-to-animation timeline compilation).
Use ChatGPT, Claude, or Gemini with a Hook-Friction-Solution-CTA framework. Instruct your text model: "Write a 130-word animated explainer script in a 2-column format. Column 1: Spoken Voiceover Narration | Column 2: Visual Animation Scene Description. Hook the audience in 3 seconds, explain the core problem, introduce our product solution, and end with a strong CTA."
Avoid relying on pure text-to-video prompts, which randomize character shapes between renders. First, generate a clear 2D or 3D character turnaround sheet (using Midjourney or FLUX). Second, pass that image as an Image Reference (IP-Adapter target) into your AI animator (like Kling or Luma) to lock facial features and costume details across every shot.
Generate your voiceover track using neural text-to-speech tools (like ElevenLabs or Fish Audio), adjusting stability controls for natural pitch changes. Import the generated voice file into specialized lip-sync animation modules (like Hedra AI or HeyGen), which map spoken phonemes directly onto your 2D/3D character's mouth geometry.
Character melting occurs when motion sliders are set too high or prompts combine conflicting style descriptors. To prevent visual distortion, dampen your motion intensity slider to a moderate level (3 to 5 out of 10), use negative prompts like "3D render blur, photorealistic skin, morphing limbs" for 2D styles, and keep requested physical character actions simple per shot.
Over 70% of viewers scroll through web and social feeds with audio turned off. Kinetic animated captions highlight spoken keywords word-by-word using high-contrast colors, ensuring your value proposition is communicated clearly without sound while driving higher completion rates for sound-on viewers.
Apply Audio Ducking inside your editing software. This feature automatically dips the background music track volume by -12dB to -18dB whenever speech is detected on the primary voiceover track. Additionally, choose upbeat instrumental tracks without heavy vocal leads so your explainer narration stays easy to understand.
Hiring a traditional animation agency or freelance studio for a 60-second explainer video generally costs between $1,500 and $7,000 with turnaround times of 3 to 6 weeks. Using AI animation workflows reduces production costs down to software subscriptions ($20 to $60/month), cutting total expenses by over 90% while delivering finished master clips in hours.
Follow this unshakeable 3-Step DIY Production Pipeline: First, draft your 2-column script using an LLM and generate a clean voiceover track in ElevenLabs. Second, generate matching animated scene clips using Image-to-Video baseline references in Kling or Luma to lock character continuity. Third, assemble your shots in CapCut Desktop, layer background music with audio ducking, add auto-captions, and export your polished 1080p master file.
Ready to try Skora AI?
Transform your ideas into cinematic video in seconds.