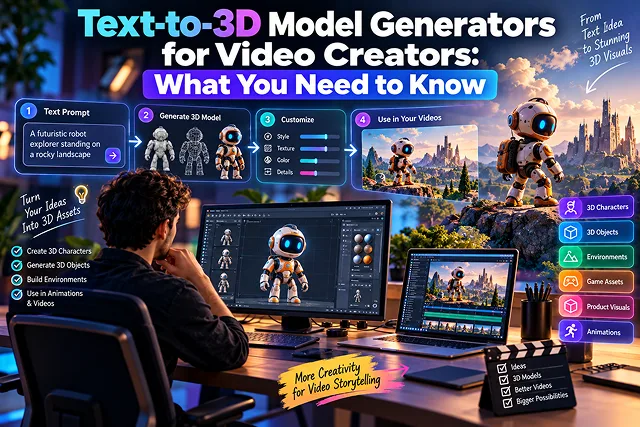
Classic methods for producing 3D assets need proficiency in performing complex tasks like modeling with box modeling techniques using Blender and sculpting digitally with ZBrush. Normally the development of specific 3D models and elements for visual effects (VFX) brings difficulties for filmmakers and virtual production teams.
However, text-to-3D conversion is a real game changer in this regard. By employing the latest deep learning technologies such as Neural Radiance Fields, international splatting methods and triplane diffusion networks, content creators can output 3D models of productions such as .glb, .obj, .fbx or .usdz titles almost instantly.
Feature Comparison: Top Text-to-3D Engines for Video Creators
Text-to-3D Synthesis Matrix · Mesh Topology, PBR Texturing, Latency & Video Production Pipelines
| Engine / Platform | Generation Speed | Mesh Topology Quality | Texture / PBR Fidelity | Export Formats | Best Use Case in Video Production |
|---|---|---|---|---|---|
| 3D Forge Engine | Fast (Browser-native) | Clean quad-optimized topology | High-contrast PBR maps | GLB, OBJ, USDZ | Hardware props, tech gadgets, & UI explainers |
| Meshy | Balanced (~1 to 2 mins) | Semi-regular quads & auto-remesh | Production PBR (Albedo, Normal, Roughness) | FBX, OBJ, GLB, USDZ, BLEND | Versatile daily driver for assets, props, & low-poly rigs |
| Tripo AI | Ultra-Fast (<15 secs) | Dense triangles (Requires retopology) | Moderate; best for concept blockouts | GLB, FBX, OBJ, USDZ | Rapid pre-visualization & fast camera blocking |
| Rodin (Hyper3D) | Slower (2 to 4 mins) | High-density clean sub-d meshes | Photorealistic (Up to 4K surface texture maps) | GLB, OBJ, FBX, USDZ | Hero close-up shots & high-ticket commercial renders |
| Microsoft TRELLIS | Local compute dependent | Sparse voxel (O-Voxel) to clean mesh | Sharp edges & Gaussian splat exports | GLB, OBJ, PLY, Splats | Open-source workflows & local GPU pipelines |
1. How Text-to-3D Generation Works Under the Hood
Early generative 3D tools used Score Distillation Sampling (SDS) to optimize a NeRF using 2D image models. This process was notoriously slow (taking 30–60 minutes per asset) and suffered from the Janus problem (where a generated character had three faces or extra limbs due to conflicting camera perspectives).
Modern 3D foundation models solve this using direct feedforward multi-view diffusion and triplane latent networks:
[Text Prompt / 2D Reference Image]
                │
                ▼
[1. Multi-View Coherence Generation] ➔ Synthesizes consistent Front, Back, Left, Right views
                │
                ▼
[2. Triplane Feature Extraction] ➔ Maps orthogonal 2D planes into a continuous 3D coordinate space
                │
                ▼
[3. Marching Cubes & Iso-Surface Extraction] ➔ Extracts a clean raw polygonal wireframe mesh
                │
                ▼
[4. Neural Texture Synthesis & PBR Baking] ➔ Generates Diffuse, Normal, Roughness, and Metallic maps
                │
                ▼
[Exportable 3D Container (.GLB / .FBX)] ➔ Direct import to Blender, Unreal Engine 5, or Cinema 4D
Key Concepts that the Video Editor Needs to Understand:
- Physically-Based Rendering (PBR) Maps: A 3D model is incomplete without correct material information. The best generators don’t just generate vertex colors but also generate the Albedo (Color), Normal (Micro-Bumps), Roughness (Glossiness), and Metallic texture maps so that the material responds correctly to the studio lighting in the 3D package.
- Retopology and Polycount: Generators create polygon models which can be highly complex and dense (500,000+ polygons). The production packages like Meshy come with the automatic retopology node which reduces the mesh into cleaner and quad dominant (say, 20,000 - 50,000 polys) so that there is no timeline slowdown during rendering.
2. The Five-Step Process for Creating Video Creator Model Production
1. Text Conceptualization & 2D Style Mapping (Image to 3D)
- Although the Text to 3D process is possible, the Image to 3D technique delivers much better geometrical precision. First, create a concept illustration of your object in FLUX.1 or Midjourney, with the object placed on a white background.
2. Geometry Synthesis & Material Generation
- Upload the reference picture into Meshy or Rodin. Pick the target topology budget (for instance, Target Polycount: 40k triangles). Create the 3D model and run the high resolution baking pass to receive the 4K PBR materials.
3. Mesh Cleaning and Scale Calibration in Blender
- Import the .fbx or .glb container into Blender. Confirm the correct metric scale (avoid the scenario where your coffee mug is 10 meters tall), align the object origin at the bottom of the model, and check normal maps for artifacting.
4. Automated Rigging & Motion Capture Retargeting
- If the asset is a humanoid or animal type, then you will be required to load your cleaned-up .obj file into Mixamo or utilize the auto-rigger function in Blender. Add any pre-baked motion capture animation sets such as running or fighting.
5. Staging Cinematic Scenes & Video Render
- Insert your rigged/static 3D model into your virtual environment in Unreal Engine 5/Blender. Set up the virtual camera motion (DOF, focal distance, dolly tracking). Render the video pass for editing.
Operational Comparison: Traditional 3D vs. AI 3D Generation
3D Asset Creation Matrix · Traditional Manual 3D Pipeline vs. Generative AI 3D Pipeline
| Workflow Step | Traditional Manual 3D Pipeline | Generative AI 3D Pipeline |
|---|---|---|
| Initial Asset Creation | 6 to 18 hours of manual sculpting and sub-d modeling. | 2 to 5 minutes from text or image input. |
| UV Unwrapping & Seams | Tedious manual seam cutting; risk of texture stretching. | Automated seamless atlas generation and projection. |
| Material Painting | Manual layer painting in Substance 3D Painter ($20/mo + hours). | Automated PBR texture generation matching prompt context. |
| Production Flexibility | Modifying a core design requires substantial rebuilding. | Change prompt parameters and re-render asset instantly. |
Request A Custom AI Video
Tell us what you're trying to create and we'll point you to the right tool — or help you set it up.
3. How Text-to-3D Works: Beyond 2D Pixel Hallucination
Early AI 3D attempts used Score Distillation Sampling (SDS) to optimize neural radiance fields (NeRFs) using 2D diffusion models—a process that took 30 minutes and often produced the multi-faced "Janus problem" (e.g., a dog with four faces).
Modern text-to-3D pipelines use feed-forward 3D diffusion and sparse voxel transformers:
[ Text Description ] ───► [ Multi-View Diffusion Synthesizer ]
                          │ (Generates synchronized front/side/back angles)
                          ▼
                    [ Sparse Voxel / Triplane Transformer ]
                          │ (Solves 3D depth, volume, & manifold geometry)
                          ▼
                    [ Neural Marching Tetrahedra (Mesh) ]
                          │ (Extracts vertices, clean quads, & UV layouts)
                          ▼
                    [ PBR Texture Diffusion Pass ]
                          │ (Bakes Albedo, Normal, Roughness, & Metallic maps)
                          ▼
                    [ Engine-Ready 3D Asset (.GLB / .OBJ) ]
- Generating multiple views: The system is able to produce several views of an object (front, orthographic sides, back) with illumination adjustments accordingly.
- Creating geometric volumes: The 3D transformer applies these views to the volumetric and sparse voxel models, leading to geometrical accuracy in the designs.
- Forming polygons: The geometric volume is transformed into a clear polygon geometry through automatic UV mapping.
- Baking of PBR textures: Features such as surface texture, reflectivity, and depth of metals are transferred to the UV mapping process that will ensure correct reflections in the virtual environment.
4. The 5-Stage Pipeline to Merge Text-to-3D in Video Manufacturing
Use this defined process to convert written detail into cinematic 3D video clips:
1. Prompt the 3D Asset with Structural Precision
- "Iso 3D model of an industrial router, painted black aluminum body, recessed LED modules, titanium rough edges, simple design, perfect lighting."
2. Produce the 3D Mesh
- Blacksmith clean, engine-ready 3D quad meshes using the 3D Forge Engine. Check the generated asset in the viewport:
3. Setup the Camera Movement & Render the B-Roll
- By using either a 3D viewport, real-time canvas, or Blender, you need to import your 3D object in order to execute a smooth orbit track for 180° to 360° camera movement. The next step is to use three-point lighting (including key light, fill light, and rim light) in order to enhance the edges of the object before exporting a video with a high bitrate.
4. Layer the Contextual AI
- You should combine the animation of your 3D animation with narrative elements.
5. Upscale and Compress with AI
- Your movie must be taken through an AI enhancer in order to deal with problem of edge aliasing and compression. It is better to encode the final version of the clip as AV1 or H.265 with CRF 22 in order to get a great video quality at smaller file sizes.
5. Reasons to Get 3D Assets for Video Creation (In Lieu of 2D)
- Object Permanence at the Pixel Level: When looking around an object in 3D space, the object does not stretch or change size.
- Flexible Camera Movement: Using our own Bézier curves, we can easily switch from 10mm wide distance view to extreme 100mm close-up.
- Dynamic Lighting: Now, any scenario can run on different lighting conditions without the need to make a new object once again.
- Mixed Usage of Pictures for Video Production: 3D image makes possible to use it as an initial image in video animation process and build up physics as well as motion in a virtual world.
Text-to-3D for Video Creators
Master neural 3D asset generation, Gaussian splatting, PBR texturing, mesh retopology, and VFX video integration.
Text-to-3D models use Neural Radiance Fields (NeRFs), 3D Gaussian Splatting, and Diffusion Multi-View Synthesis to extrapolate volumetric geometry from descriptive text prompts. Video creators use them to rapidly produce custom props, set dressings, sci-fi vehicles, and background environments without spending days manually sculpting polygons in Blender, cutting pre-production asset turnaround from weeks to minutes.
The top platforms for video creators include: Meshy AI (fast textured mesh generation with PBR maps), Luma AI / Genie (outstanding volumetric fidelity and interactive previewing), Tripo3D (ultra-rapid 8-second base mesh drafts with native auto-rigging), CSM (Common Sense Machines) (strong CAD-adjacent hard-surface geometry), and Rodin by Deemos (specialized in detailed digital characters and busts).
Polygonal Meshes (.OBJ, .GLB, .FBX) consist of vertices, edges, and texture UV maps; they can be rigged, animated, deformed, and lit with dynamic scene lights. 3D Gaussian Splats (.PLY) are clouds of millions of tiny colored ellipsoids that capture photorealistic lighting and reflections effortlessly; they are ideal for realistic camera fly-through backgrounds, but are difficult to rig for skeletal character animation.
Text-to-3D relies on textual interpretation, which often produces generic or unintended shapes. In contrast, Image-to-3D allows you to generate a 2D hero image first (using Midjourney or FLUX) with your exact desired color scheme, proportions, and aesthetic details. Feeding that 2D still into an AI 3D generator locks down the silhouette and surface details, ensuring the resulting model matches your concept art.
The Janus Problem (or Multi-Face Artifact) occurs when an AI generator gets confused by camera angles and generates two front faces (or multiple heads/limbs) on opposite sides of a character. You can avoid this by using models trained with explicit multi-view diffusion, using clear 3/4 isometric prompt descriptions, or providing a multi-view reference sheet (front, side, and back views) as input.
Raw AI 3D models often export as "triangle soup"—heavy, disorganized meshes that slow down rendering viewports. Video creators resolve this through Automated Retopology (Quad Remeshing). Built-in remeshers in tools like Meshy or external Blender add-ons (such as Quad Remesher) convert messy triangles into clean, uniform quad loops, reducing polycounts by up to 80% while preparing the asset for clean bone rigging.
Early AI models baked shadows and lighting directly into a flat diffuse texture, making objects look flat and fake when camera lights moved. Modern tools export complete PBR Texture Bundles (Base Color, Roughness, Metallic, and Normal Maps). This separates the surface colors from physical reflective properties, allowing the asset to interact realistically with virtual studio lights, neon signs, and camera flashes.
Yes. Once a character model is generated in a neutral T-pose or A-pose, you can import the .FBX file into Adobe Mixamo, AccuRIG, or Tripo3D's native auto-rigger. These AI tools identify joint locations (wrists, elbows, knees) in seconds, apply an internal skeleton rig, and allow you to retarget motion capture files (like walking, fighting, or dancing animations) for immediate cinematic rendering.
The workflow follows standard VFX matching: 1. Matchmove / Camera Tracking (tracking real camera movement in Blender or After Effects), 2. Shadow Catcher Placement (placing invisible ground planes to catch contact shadows), 3. HDRI Environmental Lighting (matching the physical scene's lighting orientation), and 4. Focal Blur & Grain Matching to blend the digital render seamlessly with camera sensor noise.
Follow this proven 3-Step 3D Creation Pipeline: First, generate a crisp, isolated concept image on a neutral gray background in Midjourney or FLUX. Second, import the image into Meshy or Luma to generate the 3D polygonal mesh, applying auto-retopology and generating full 4K PBR texture maps. Third, export as an FBX or GLB into your 3D engine (Blender or Unreal Engine), set your camera keyframes, apply cinematic depth of field, and render the final composite video pass.
Ready to try Skora AI?
Transform your ideas into cinematic video in seconds.